

Can your child's insulated lunchbox really keep food fresh and stay safe to use? It can be hard to tell. Outwardly sturdy models sometimes hide thin insulation, weak seams, or surface coatings that may transfer chemicals into food.
Do three quick checks to tell if a lunch box is durable and keeps meals safe. First, inspect construction and insulation: look for neat stitching, solid zips, and substantial insulation layers. Frayed seams, loose linings, or thin insulation can mean it will wear out or fail to keep food at the right temperature. Second, verify materials and certifications: check labels for food-safe terms like BPA-free, and for recognised safety marks or testing information. Missing or vague labelling can signal unknown risks. Third, confirm the finishes are free from harmful chemicals: avoid coatings that flake, strong chemical smells, or surfaces that transfer colour to your fingers, since these suggest unsafe treatments. These checks help you spot weak stitching, inadequate insulation, missing safety marks, and unsafe coatings before they affect your child’s meal.
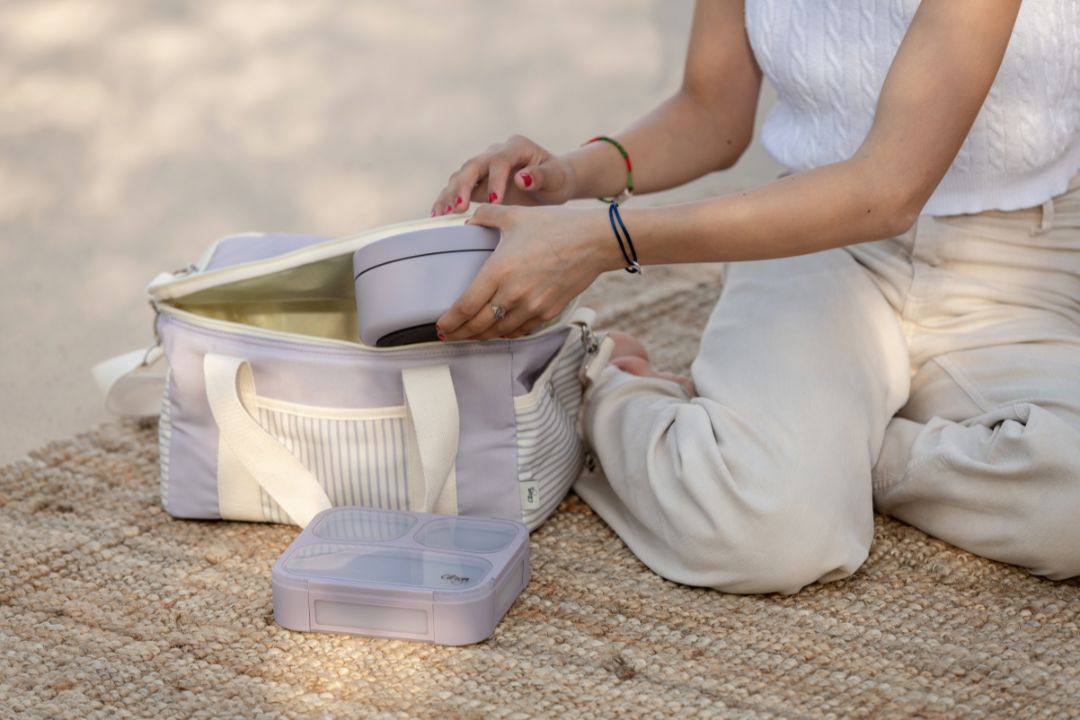
1. Check the construction and insulation of your lunchbox
Begin by checking the seams, stitching, handles, and base. Gently tug the handles, press the corners, and inspect the stitch lines for even stitching, double rows, or bar tacks (extra stitches) at stress points. Loose threads, puckering, or fabric separating from the insulation often signal premature failure. Run each zip and closure fully open and closed to make sure they move smoothly and the teeth align, and check that lids or flaps overlap enough so the insulated interior closes without gaps that could let air or spills escape. These simple, hands-on checks will often reveal weaknesses that specifications alone do not show.
When checking a lunch bag or insulated box, use a quick visual and hands-on check to spot weak insulation. - Visual inspection: Look for a continuous foam layer or a metallic inner lining. Shine a torch into corners and check for bubbles, cracks, thin spots, or exposed foam. Delamination or bubbles create pockets that can hold moisture and crumbs. - Check seams and seals: Run your finger along seams and joins. Are they taped or sealed rather than only glued? Glued seams that lift or separate are more likely to trap food debris and let moisture in. - Simple home test: Put a cold item or an ice pack inside for a few minutes. Feel the outside and the seams for unexpected dampness or chill. If the exterior or seams feel cold or wet, the vapour barrier may be broken or there may be a heat bridge. - Think about cleaning and durability: Prefer removable, wipeable linings or insulation that is sewn or fully encapsulated. Delicate reflective films or glued insulation can separate after repeated washing, so treat those as potential failure points. In short, favour designs with continuous bonding and sealed seams, and be cautious of exposed or delaminated insulation that will trap moisture and wear faster under everyday use.

2. Check food-safe materials and certification labels
Look for material markings that show the item is suitable for food contact, for example 304 or 18/8 stainless steel, food-grade silicone, polypropylene marked PP5, or aluminium that specifies a food-safe lining. Stamps, recycling codes, or material labels usually appear on the base, inside the lid, or on the packaging, so check those places and match the code to the material. 18/8 stainless resists corrosion and is unlikely to leach; food-grade silicone tolerates heat and is chemically inert; PP5 indicates a stable, low-leach plastic. Aluminium can be used for food, but only when a verified food-safe lining is present, so if you cannot find clear markings, ask the retailer or manufacturer for a material declaration.
Beyond material markings, a few simple checks will reveal fluorinated coatings and other common hazards in lunchware and insulated containers. Use these practical steps at home, and ask suppliers for specific documents when you need extra assurance. 1. Ask for explicit statements and reports - Look for an explicit PFAS-free or PFOA-free claim. - Request the material safety data sheet and any independent migration test reports. - Ask for recognised food-contact approvals, such as LFGB, EN standards, or NSF, and note the certificate or report numbers. 2. Check the scope of testing - Confirm that test reports cover the exact parts you will use, and the temperatures and conditions you expect in everyday use. 3. Do a quick wipe test - Swill warm water around the interior, then wipe with a paper towel. - An oily residue on the towel can indicate a fluorinated coating. 4. Inspect decorations and trims - Look for flaking on colourful graphics and metallic trims. - Ask the supplier for lead and cadmium screening results, or test painted areas with a consumer lead swab if you want a quick check. 5. Verify insulation construction - Ensure any insulating foam is fully enclosed behind a continuous food-grade lining, with welded or tight seams. - Fill the container with warm water and sniff for solvent odour; a persistent smell can indicate gaps in the lining or incomplete enclosure. If you cannot obtain clear documents, or if you find oily residue, flaking, or a solvent smell, consider asking for independent testing or choosing a different product. These checks give you practical evidence to help decide which lunchware feels safe for everyday family use.

3. Confirm product finishes are free from harmful chemicals
Ask the manufacturer for a food contact certificate or safety data sheet, and read those documents for the listed ingredients, solvent residues, and curing processes. That lets you assess documented test results instead of relying on broad claims. Request explicit test reports that show the finish is free from PFAS, bisphenol A, lead, phthalates, formaldehyde, and other heavy metals, because these substances can migrate into food and build up with repeated exposure. Make sure the report links to the specific material batch, and check the stated detection limits and the analytical methods used so you understand what the tests could actually detect.
If documentation is limited, inspect the interior finish before you use a new lunchbox or container. It only takes a minute and can reveal coatings that might flake or wash into food. Checklist for parents: - Wipe and rub: Use a clean white cloth to wipe the inside, then apply light abrasion by rubbing a coin or another clean cloth across the surface. Visible flaking, a powdery residue, or discolouration can indicate poor adhesion or an unstable coating that might shed into food. - Prefer certain interiors: Look for plain stainless steel, baked enamel, or powder-coated finishes cured at high temperature. Ask the seller or manufacturer what process they used, because higher cure temperatures and inorganic surfaces generally leave fewer residual chemicals than low-bake paints. - Ask for independent testing: Request independent migration testing rather than relying only on manufacturer claims. When you read a test report, check the test method, the food simulants used, the temperature and time conditions, and the detection limits. - Match the test to the product: Verify that the results apply to the same material batch or production run so the report reflects the item you will actually use. These simple steps support an informed choice about the safety of your familys lunchware.
Taken together, a durable, safe insulated lunchbox pairs sturdy construction with food-safe materials and finishes that do not leach into food, so it protects meals and reduces chemical exposure. You can check for problems at home: give the handles a firm tug to test the stitching, press the outside after adding an ice pack to feel for any chill, and rub the lining to look for flaking, oily residue, or loose fibres, signs that labels alone might not reveal.
To recap, before you buy or use a lunch box, run these three simple checks: construction and insulation, materials and certification, and finish testing. - Construction and insulation: Look for reinforced stitching and secure seams, and check that the insulation inside is continuous and sealed. Gaps or weak stitching can cause leaks and make the box fail sooner. - Materials and certification: Read labels and any accompanying paperwork for independent migration test results and recognised safety certifications. Migration tests show whether chemicals can transfer from the materials into food, so they give a clear, evidence-based comparison between options. - Finish testing: Inspect coatings and surface finishes for flaking, uneven texture, or a strong chemical smell. A durable, intact finish reduces wear and the risk of particles shedding into food. Carrying out these checks reduces the risk of leaks, premature failure, and chemical transfer, and gives you straightforward, testable criteria to compare lunch boxes.