
Nothing ruins a packed lunch faster than soup seeping into sandwiches, or a dressing escaping into fruit and snacks. If you dread soggy bread and stained boxes, choosing the right containers can be the simplest fix.
This friendly guide covers ten container types and practical tips to stop soups, dips and dressings leaking in a lunchbox. You will find clear notes on sealing mechanisms, food-safe materials, gasketed lids, insulated flasks, small dispensers and portion sizes, together with smart packing strategies, temperature control and easy care. Read on for handy ideas on which designs suit different meals, how to pack them securely for busy mornings and back to school, and how to look after them so lunches stay leak-free and appetising.

1. Stop soggy lunches: recognise common causes of leaks
Give lids and seals a quick once-over for faults like warped plastic, hairline cracks or stretched gaskets. Try a simple water shake test over a paper towel to spot any dampness, since visible deformation or wet patches usually mean a real-world leak. Let hot soups and dressings cool and leave a little space at the top, as steam and trapped air can build pressure and force lids open. Match the container to the liquid: thin, vinaigrette-style dressings and broths find tiny gaps more easily than thick dips, so thicken runny fillings, pop dressings into a smaller pot, or use closures with a compressing seal to stop seepage through minute gaps. Wipe sealing surfaces clean and dry before closing, because crumbs or oil stop seals seating properly and create channels for escape.
For packed lunches, keep liquid containers upright in a dedicated pocket and cushion them with soft items such as a rolled-up flannel or spare jumper to limit movement. Put leak-prone jars inside a secondary waterproof pouch or wrap them in a cloth to catch any drips and add an extra layer of protection without changing recipes. Combine these simple checks with choosing the right container and a secure lid to reduce the chance of lunchbox leaks and help you pick the best vessel for each texture.
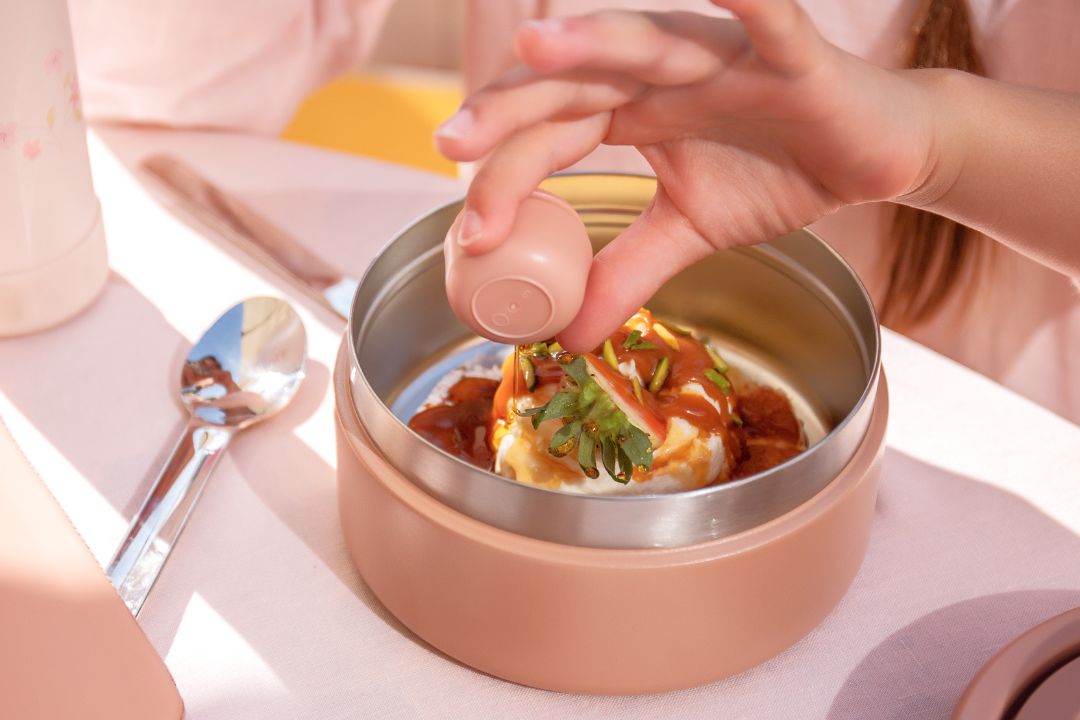
Keep leaks out—pack a leak-proof insulated food jar.

2. Choose lids and closures that seal reliably for busy family life
Match the closure to the food's texture. Screw-top lids with a flexible silicone gasket work best for brothy soups and thin dressings. Snap-lock lids with several clips are better for chunkier soups, while valved or press-to-seal spouts reduce seepage from oil-based dressings. Pick a closure that sits flush against the rim to minimise gaps where liquid can escape. Also think about temperature and pressure: allow very hot soups to cool slightly before sealing, or use lids with a vent so steam can escape and lids do not pop up. A little extra care here can help avoid a soggy lunchbox and keep mealtimes stress-free.
Pay attention to the gasket. Removable silicone gaskets compress to fill tiny gaps, resist odours and tolerate repeated washing, so check them often for cracks or warping. After cleaning, make sure the gasket is properly reseated and replace any that have become deformed. Try a simple, realistic leak test before sending a packed lunch out the door. Fill the container with water, close it fully, turn it upside down and give it a good shake. Repeat the same test with the sealed container inside a waterproof bag to see how much seepage would reach a lunchbox or schoolbag. Match the closure to the user and routine. Single-action clasps or wide screw threads are easier for little hands, while multiple locking clips give maximum hold for busy days. For extra peace of mind, carry a sealed container inside a secondary waterproof pouch.
Seal soups reliably; protect lunchbags from leaks.

3. Choose food-safe materials that resist stains and lingering odours
Choose non-porous, food-safe materials such as glass, food-grade stainless steel (for example 18/8 or 304), food-grade silicone, polypropylene and high-density polyethylene. Glass is inert and will not absorb odours or leach with acidic dressings. 18/8 or 304 stainless steel resists staining and physical damage. Silicone gives flexibility and a reliable seal, while polypropylene resists stains and odours better than many other plastics. Avoid untreated aluminium with acidic or oily contents, and do not use polystyrene or PVC for hot or acidic foods. Check for the fork-and-glass food-safe symbol, resin code 5 for polypropylene, BPA-free or food-grade markings, and metal grade stampings. If a container lacks clear markings, treat it as unknown rather than assume it is safe.
Choose plain, uncoated interiors where you can. Uncoated glass and stainless steel are best at resisting stains and lingering smells, while enamel, painted finishes, non-stick coatings or decorative lacquers can chip or start to trap odours after repeated washing. Clean with hot water and a good dish soap, then follow with a vinegar rinse or a paste of bicarbonate of soda to neutralise any remaining smells. For dishwasher-safe items, run them on a regular cycle to remove oils, but be careful not to scrub silicone seals with harsh abrasives as this can create tiny tears that harbour odours. Give lids and gaskets a regular once-over for hairline cracks or discolouration and replace worn seals to keep the barrier reliable. Try simple home checks like an overnight vinaigrette smell test and a turmeric or beetroot spot-test to see how easily stains set. Store containers with the lids off to dry so you can judge how they perform in real, everyday use, especially for packed lunches.
Bring stainless utensils stored in a soft silicone case.

4. Fit lids with gaskets and secure locks for spill-free lunches
A few simple checks at home will help you spot a reliable lid. Look for lids with removable silicone gaskets that form a continuous seal around the rim, and take the gasket out to check for cracks, flattening or any gap that stops it sitting flush against the container lip. Lids with several clips or a clamping frame spread pressure more evenly than a single front latch. To test a locking system, fill the container with water, close it, turn it upside down and gently shake it over a paper towel to reveal any small leaks. Steer clear of thin single-lip seals, segmented gaskets and vented lids that do not secure fully, as pressure from hot food or from sloshing can expose their weaknesses.
After every use, clean the gasket channel and dry the gaskets separately to prevent mould. Give each gasket a gentle stretch and bend by hand to check for brittleness or stickiness. If a gasket does not spring back, replace it, as ageing seals lose their bounce and can start to leak with normal use. Where possible, pick containers that add a backup seal, such as an inner snap-in cup or a screw-top insert, so a single faulty seal does not leave a packed lunch soggy. As an extra precaution, pop the closed container into a sealed reusable bag or keep it in a dedicated leakproof compartment to catch any unexpected failures.
Choose a lunch set with removable gaskets, fully leakproof

5. Match container shape, size and portions for spill-proof lunches
Choose squat, wide pots that mirror the lunchbox footprint so they sit low and steady in the bag. That lower centre of gravity helps prevent tipping and cuts down on sloshing. Fill containers with only a small air gap above any liquid; less trapped air means less internal movement and fewer pressure changes during transport. Use single-portion pots for dressings and dips, tucking them into a snug compartment so they cannot tilt between firmer items. Match lids to the container shape and favour flat lids for stacking, which keeps contents still and makes the most of the space.
Think about how runny the filling is when you choose a pot. Thin soups are best in lower, wider containers or ones with an extra inner seal so there is less empty space for sloshing. Thicker dips do better in shallower pots that spread the weight and stay put. Pack tubs upright and tuck them in among firmer items or into snug recesses in the lunchbox to stop them sliding sideways. Matching portion size, shape and lid type makes stacking more secure and helps keep dressings, dips and soups from shifting or leaking.
Tuck pots into a bento-style box to prevent sloshing.

6. Keep soups hot with insulated flasks and thermoses
Vacuum and double-wall construction work by trapping a low-pressure gap between the inner and outer walls, which slows heat transfer. Stainless steel adds thermal mass and resists odours and denting, so a flask will keep temperature and flavour better than a single-wall container. A few simple tips: warm the flask first by rinsing with hot water, then fill while it is still hot, leaving a small headspace so steam can expand. Screw the lid on firmly and check the seal by turning the flask upside down over the sink before you pack it. For chunky soups and easier cleaning, choose a wide-mouth flask; if you prefer sipping broths, a narrow-neck design is handier.
Carry the flask upright in a cushioned compartment or pop it into an insulated sleeve to protect the seal, keep drinks at the right temperature and stop it rattling or tipping over in your bag. Take out and wash any silicone gaskets after use, rinse the flask soon afterwards to avoid staining and lingering smells, and leave it to air-dry completely to prevent mould. Check seals now and then and replace them as soon as they show signs of wear to maintain leak-proof performance and keep flavours fresh.
Keep meals warm and spill-free on the go.

7. Portion out dressings and dips into handy leakproof mini dispensers
Pick a mini dispenser that suits the condiment's thickness and the portion you need. Narrow-nozzle bottles are best for runny dressings, wide-mouth pots for thick dips, and small screw-top jars for spoonable amounts. Test the seal by filling the dispenser, fastening the lid, inverting it over the sink and giving it a quick shake to spot any leaks. Leave a little headroom rather than overfilling, tighten the lid securely, and pop the dispenser upright among other lunch items to reduce sloshing and pressure on the seal.
For extra protection, pop the mini dispenser into a resealable food bag or a small compartment in the lunchbox and cushion it with soft items so it does not move about. Portion dressings into single servings and label each pot with what is inside and any allergy information so the correct portion is obvious at a glance. Tiny frozen portions of emulsified dressings are handy too; they double as a cold pack and thaw into a ready to use serving. Together these little steps keep packed lunches tidy, cut the chance of leaks and add convenience without extra bulk.
Keep sauces sealed and separate for mess-free lunches.
8. Pack your lunchbox snugly to minimise movement and avoid spills
Choose containers that match the portion and fill pots so there is little empty space, which helps stop sloshing. If you plan to partially freeze a liquid, leave a small headspace so it can expand without cracking the container. Wipe the rims clean and fasten lids snugly, then add a second barrier by covering the opening with a square of cling film or popping small sauce pots into a sealed food bag. These simple precautions keep liquids contained and stop tiny drips from turning a lunchbox soggy.
Anchor heavier, denser foods at the bottom of the lunchbox and nestle smaller pots around larger ones to reduce movement. Tuck flat items like cutlery or a cloth napkin into gaps to stop things rolling. Line the base with a non-slip mat or an absorbent cloth to increase friction and catch small drips, and use internal compartments or little pots to keep wet foods away from dry items. Frozen elements can double as stabilisers, for example freeze a portion of soup or include a solid ice block beside a liquid pot, but always leave a little room for expansion to avoid bursting. Combining immobilisation, separation and absorbent layers makes leaks much less likely to spread through the lunchbox.
Locks liquids and compartments for leak-free, tidy lunches

9. Manage temperature and condensation to keep packed lunches leak-free
Cool soups and dressings to near room temperature before sealing the container. Leave one to two centimetres of headspace so any steam can condense without being forced past the lid. Pre-chill containers or include an ice pack, as condensation happens when a cold surface meets warm, moist air; reducing that temperature difference helps stop moisture forming around the lid. These simple steps lower the pressure that can push liquid through gaps, so the seal, not trapped steam, keeps everything inside.
A handy trick is to freeze small portions in flexible containers and pack them snugly. Frozen fillings are less likely to slosh or leak and will defrost slowly during the day. Leave a little space at the top to allow for expansion, and avoid brittle containers that can crack when they freeze. Before packing, check each seal: give silicone gaskets a quick clean, tighten lids evenly and test by turning the container upside down and giving it a short shake over the sink to spot any weak seals. For extra peace of mind, pop sealed pots into a waterproof bag, stand them upright in the lunchbox and wedge them between firmer items so any small seepage is contained and lids stay snug.
Seal in dressings with a leakproof, compartmentalised lunch kit.

10. How to clean, care for and choose sustainable lunch containers
Rinse containers soon after use and take lids and seals apart so you can clean them properly. Use a soft brush and warm soapy water to get right into the threads and gaskets. For stains or unpleasant smells, make a paste of bicarbonate of soda and water, gently work it in, then rinse. Air-dry all the parts separately so moisture cannot get trapped and cause mould. To check for leaks and how the seals are holding up, assemble the container, fill it with warm water, turn it upside down and give it a gentle shake; watch for any seepage around seals or seams. If you spot any leaking, replace the gasket or lid. Avoid exposing containers to heat unless they are marked heat-safe, as heat can warp seals and lead to leaks.
Give removable parts a quick check for wear. Inspect silicone gaskets, valves and plastic threads for cracks, brittleness or permanent discolouration, and replace small parts to restore performance rather than binning the whole item. Where possible, choose durable, single-material options such as glass, stainless steel or food-grade silicone, as these resist odours, last longer and make recycling and repair simpler. Store strong-smelling dressings in glass or silicone, and avoid prolonged contact between acidic dressings and uncoated reactive metals. Follow your local recycling rules for mixed materials, and consider donating or repurposing containers that are still intact to extend their service life. A little care goes a long way in keeping things working and reducing waste.
Choose containers that suit the food and the journey. Look for secure gaskets, tight lids or continuous seals, and non-porous interiors so soups, dips and dressings do not leak into the rest of the lunchbox. Test seals before you set off, let hot fillings cool slightly before closing, and leave only a little headspace so pressure and sloshing work with the lid rather than against it.
Use this as a quick checklist: gasketed lids, insulated flasks, mini dispensers, stable shapes and careful packing. Keep containers clean and replace worn seals to maintain performance. These small, repeatable habits catch most problems before they reach the lunchbox and help meals stay tidy and appealing.