

We know packing lunches can feel like a balancing act. Portions must fuel growing kids, cut food waste, and keep everything fresh until breaktime. Too little and they are left hungry, too much and food ends up in the bin, while soggy sandwiches or warm yoghurt leave you second-guessing your choices.
In this post, you'll learn how portion planning by age and activity, insulation, and clever compartmentalisation work together to reduce food waste, stop leaks, and keep lunches at safe temperatures. Matching portion sizes to your child's age and activity cuts leftovers, insulated linings keep perishable items safe, and separate compartments prevent spills and soggy sandwiches. The post also explains how to choose safe, sustainable materials and hard-wearing, easy-to-clean designs, such as BPA-free plastics, stainless steel, food-safe silicone, and durable, washable fabrics, that adapt as your child grows and help the lunch box last longer.

How to plan portion sizes for children by age and activity level
Use simple, scalable portion cues children can follow: a palm-sized piece of protein, a fist of vegetables, a cupped hand of carbohydrates, and a thumb of fat. Scale these cues up as children grow, from younger children through to teenagers. Give quick examples to help parents visualise servings, for example diced chicken for protein, grated carrot for veg, an oat flapjack for carbohydrates, and a smear of nut butter for fat. Plan two baseline menus, one for low-activity days and one for high-activity days. On busy days increase the carbohydrate portion and add a small extra snack for sports or clubs. On calmer days reduce dense carbs while keeping protein and vegetables a bit higher. This simple split makes it easy to adapt lunches to changing energy needs. Choose lunchbox features that grow with your child. Modular containers, removable inserts, and stackable pots let you add or remove portions as appetites change, and favour leakproof, insulated designs to help keep food safe and tasting fresh.
Reduce waste by calibrating portions with evidence, not guesswork. Try a one-week leftovers log to see how much your child actually eats, then start with slightly smaller portions and offer seconds in a reusable extra pot if they finish. Involve your child in portion decisions to improve uptake. Pack for satiety and steady energy by pairing carbohydrates with protein, and fibre — for example, a wholegrain wrap with hummus and grated courgette, or yoghurt with fruit and crushed seeds. Check the school’s allergy policies and food rules before you pack so you can adapt menus safely.
Use insulated compartments to keep balanced meals fresh.

How to use insulated boxes to keep packed lunches at safe temperatures
Vacuum-insulated or thick-walled lunch boxes reduce heat transfer compared with single-wall plastic. That helps keep perishable foods chilled, maintain hot meals at safer temperatures, and stop sandwiches going soggy or salad leaves wilting. A few quick checks will tell you how well a box performs: inspect the lid seals and gaskets for a tight fit, prefer leakproof compartments and removable liners, and use a small food thermometer to confirm the box holds the temperatures you need. Choose models with removable dividers and stackable inner pots so you can size portions, separate wet from dry, and add a small reusable pot for yoghurt, dips, or chopped fruit rather than relying on single-use packaging.
To cut waste and make packed lunches last longer, swap single-use items for reusables: a reusable ice pack, a dedicated utensil case, and a washable napkin. Choose lunchboxes made from robust materials with replaceable seals and hardwearing finishes so the box stays in service for years rather than being discarded. Look for modular designs with attachable snack pots or extra containers and neutral shapes that sit comfortably in different backpacks, so the same lunchbox adapts from nursery to school. Together, these choices help you manage portions, keep food safe, reduce single-use waste, and prolong the kit's useful life.
Seal in freshness with vacuum-insulated compartments.

How to use lunchbox compartments to control portions and prevent leaks
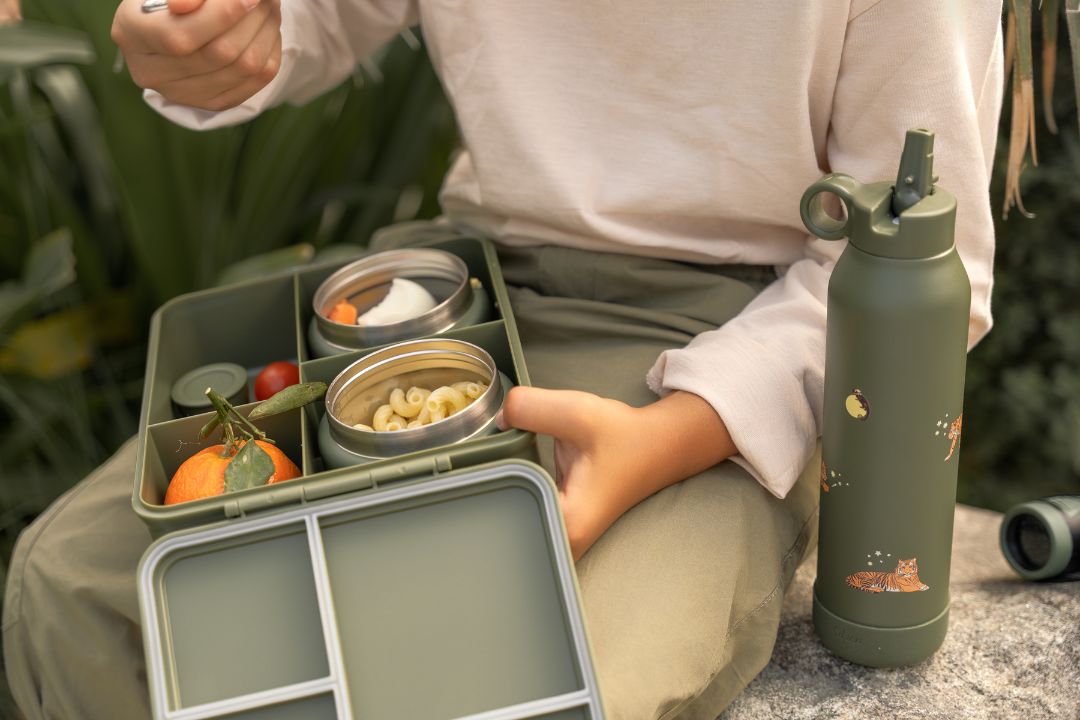
Choose a lunch box with removable or adjustable inserts so you can resize compartments as your child grows. Aim for one larger space for carbohydrates, one medium for protein, and one or two small spaces for vegetables and fruit to help avoid portion creep. Use compartment size as a simple visual guide: a protein portion should fit the palm, a carbohydrate portion the cupped hand, and vegetables can fill one or two small compartments. Packing by these cues reduces uneaten oversized portions and means you do not need to replace the whole box when appetites change, since the removable inserts let you adapt the layout as portions shift.
After resizing compartments, start with leakproof seals and try this simple home test: fill a compartment with water, close the lid, turn it upside down and give it a gentle shake. If any liquid escapes, pack dressings and dips in separate sealed pots, or place wet items upright in a central compartment. Use reusable silicone cups or liners to separate wet and dry foods to prevent sogginess and flavour transfer, and reserve a ventilated compartment for crisp snacks so they stay crunchy. Choose lunchboxes with removable liners, smooth internal corners, and parts that are dishwasher-safe or easy to handwash to keep them hygienic, encourage reuse, and cut single-use packaging waste.
Compartment strategies for portions, leaks, and long life
- Use age and activity templates: resize removable inserts to suit different stages and activity levels; toddlers get one small carb, one palm-sized protein, and one or two tiny veg spaces; school-age children get a cupped-hand carb, a palm-sized protein, and a veg compartment; sports days or teenagers get a larger carbohydrate area or an extra snack compartment to match higher energy needs.
- Treat compartment size as a visual portion guide: pack protein to fit the palm, starches to the cupped hand, and fill one or two small compartments with vegetables or fruit to avoid portion creep and reduce uneaten food.
- Make leakproofing a routine: test seals at home by filling a compartment with water, closing the lid, inverting and shaking; if any liquid escapes, transfer dressings and dips to small sealed pots, place wet items in a central upright compartment, and carry a reusable silicone pot or screw-top pot for stabilising liquids on the go.
- Prevent sogginess and preserve texture: separate wet and dry foods using reusable silicone cups or removable liners, reserve a ventilated compartment for crisp items, and choose boxes with smooth internal corners and removable liners to make cleaning easier.
- Extend lifespan with simple maintenance: disassemble gaskets and lids for regular washing, run dishwasher-safe parts through cycles if permitted, soak odorous components in a baking soda solution, replace worn seals to restore leak resistance, avoid abrasive scourers, and store boxes open to dry fully between uses.
How to choose safe, sustainable materials for family lunchware
Different lunchbox materials behave differently, so match the material to the foods you usually pack and to how you clean it. Food-grade stainless steel is inert, resists staining and odours, and insulated versions keep hot foods hot and cold foods cold without disposable liners. Glass is non-porous, preserves flavours, and reheats well in the microwave with minimal odour retention. Food-grade silicone gives flexible seals and good heat tolerance, while plastics vary widely in heat resistance and in the risk of chemical migration, so look for food-safe markings. Choose designs with wide openings, smooth corners, and removable seals to reduce trapped food and mould, and check that the material tolerates the cleaning method you plan to use, whether dishwasher cycles, boiling water, or hand washing.
Beyond matching materials to the foods you pack and the way you clean them, when choosing lunchware for busy family life, favour mono-material (single-material) designs with clearly removable parts. Mixed materials, glued layers, and bonded insulation often cannot be recycled, so check recycling codes and the manufacturer's disassembly guidance to plan for a product's end of life. Prioritise durability and repairability by inspecting seams, lids, and hinge mechanisms, and opt for thicker stainless steel, tempered glass, reinforced hardware, or designs that offer spare parts. These choices cut turnover and household waste. Modular compartments or removable inserts add flexibility for changing appetites and make portion control easier as children grow.
Pack stainless utensils in a silicone case for easy cleanup

Choose durable, easy-to-clean lunchboxes that adjust to changing needs
A handy tip: choose a lunchbox with a mix of small and larger compartments and removable dividers. That lets you portion for a packed lunch or open up the space when appetites are bigger. To judge portions, use your child’s palm, a small ramekin, or a standard mug. Pick layouts that keep wet and dry foods separate to stop sogginess and reduce waste. Modular, stackable, or insert-friendly systems mean the same box can work for a toddler one week, a hungry schoolchild the next, and snacks for activities later on. Opt for designs that accept extra pots, and favour boxes that can be simply repaired or recycled rather than needing wholesale replacement.
For durability and odour resistance, stainless steel is hard to beat: it is non-porous and stands up to knocks. Rigid food-grade plastics are lighter, but they can scratch and absorb smells, so check wall thickness, hinge strength, and latch design before you buy. Look for boxes with replaceable parts or reinforced corners, wide openings, smooth internal surfaces, and removable silicone seals so you can dismantle lids and gaskets for proper cleaning. If you want lower-effort maintenance, favour models marked dishwasher safe. To check leak and odour control at home, fill a compartment with water, seal it, and invert it to test the seals. For soups or yoghurts, use a single-compartment sealed flask or a container with a secure lid and gasket to avoid spills.
A good lunch box gets three things right: clear portion guidance, effective insulation, and sensible compartmentalisation. Those features help keep food safe and fresh, and make it more likely to be eaten rather than wasted. Match visual portion cues to your child’s age and activity, for example, a smaller snack section for toddlers and larger compartments for sporty schooldays. Removable inserts let the same kit adapt as children grow, and choosing durable, repairable materials means one set can last for years.
Check portion planning, insulation, compartmentalisation, and the materials used to spot features that prevent leaks, help keep little ones' energy steady between meals, and cut down on single-use packaging. Choose a modular, easy-to-clean system with replaceable seals and stackable pots so you can try it at home, adapt it with your child, and extend its useful life.