

Packing a hot meal and chilled snacks for school seems simple, until the pasta goes lukewarm or the yoghurt sits too warm and you start to worry whether it is still safe to eat. How do you choose a lunchbox that keeps hot food hot, chilled food cold, and prevents spills or contamination by lunchtime?
In this guide you will learn what insulation can realistically do, how size and compartments suit children's portions, which food-safe, eco-conscious materials matter, and which practical features and cleaning routines keep performance consistent. With a few simple choices and a little care, you can reduce food waste, prevent soggy lunches, and lower the risk of tummy upsets, making it more likely children will eat what you packed.
What insulation can realistically do for packed lunches
Think of insulation as a shield against heat loss and gain. It works in three ways: trapping air in fluffy, high-loft fibres to limit conduction and convection, using a reflective liner to cut radiant heat loss, and adding dense layers that provide thermal mass to slow temperature change. In practice that means insulation delays how quickly a hot dinner cools and a chilled snack warms, but it does not create heat or cold on its own. How well it performs depends on the food's thermal mass, the temperature difference with the surroundings, how snugly the box fits and seals, and whether you add active elements such as hot or cold packs. Use a probe thermometer to check the actual temperature trajectory for your setup.
Start with a quick test load and a thermometer to know how your system performs, then use these practical habits to get better temperature retention. - Pre-condition the container. Warm a flask or lunch box with hot water, or chill it in the fridge before packing. This reduces initial heat loss or gain, so food spends less time moving toward room temperature. - Pack smart. Place hot items centrally, and keep cold items next to chilled packs at the edges. Central placement lowers surface exposure and slows cooling. - Use snug containers and wraps. Tight-fitting pots, foil, or fabric wraps reduce exposed surface area and limit air movement around the food. - Separate hot and cold. An insulated divider or separate compartments prevents heat transfer between items you want to keep at different temperatures. - Combine insulation with active packs. Good passive insulation plus frozen gel packs, hot packs, or a vacuum flask gives longer retention than either method alone. Press packs into direct contact with food where possible to speed heat exchange in the direction you want. - Match layers to the food. Lightweight air layers work well for low-mass snacks, while evening meals benefit from added thermal mass, so choose wraps and packs to suit the contents. - Check seals and manage moisture. Inspect lids and seals for leaks, and use absorbent paper or small vents to control condensation and stop sogginess. - Keep the system consistent. Replace or recharge packs between uses, and test performance by packing the box as you would normally and measuring with a probe. These small adjustments—pre-conditioning, sensible placement, and the right combination of insulation and packs—make a noticeable difference in how long food stays at the temperature you want.
Warm a compact thermal jar to keep meals hot

How to choose the right lunchbox size and compartments for kids' portions
Match the lunchbox volume to your child's typical portions, taking age and appetite into account. Size compartments for a small main, a snack, and a pudding to avoid overfilling and excess air, which reduces heat retention. Use adjustable or removable dividers so you can reshape spaces as portions change, keep wet and dry items apart, and stop soft foods being squashed in transit. Aim for a snug fit: shallow wells for foods that cool quickly, and deeper, thick-walled sections for dense mains.
Try packing hot food into a compact, well-insulated compartment or a small vacuum-insulated pot inside the lunchbox. Keep chilled items in a separate sealed section beside an ice pack to minimise heat transfer and reduce cross-contamination. Use shallow pots for fruit and yoghurt so they cool evenly, and save deeper cavities for mains, because compartment depth and wall thickness affect how long food stays hot or cold. Include small sealed pots for dressings, sauces, or extra yoghurt to contain runny foods and prevent spillages. Choose containers that are microwave-safe, dishwasher-safe, and BPA-free so reheating and cleaning are straightforward and food safety is maintained.
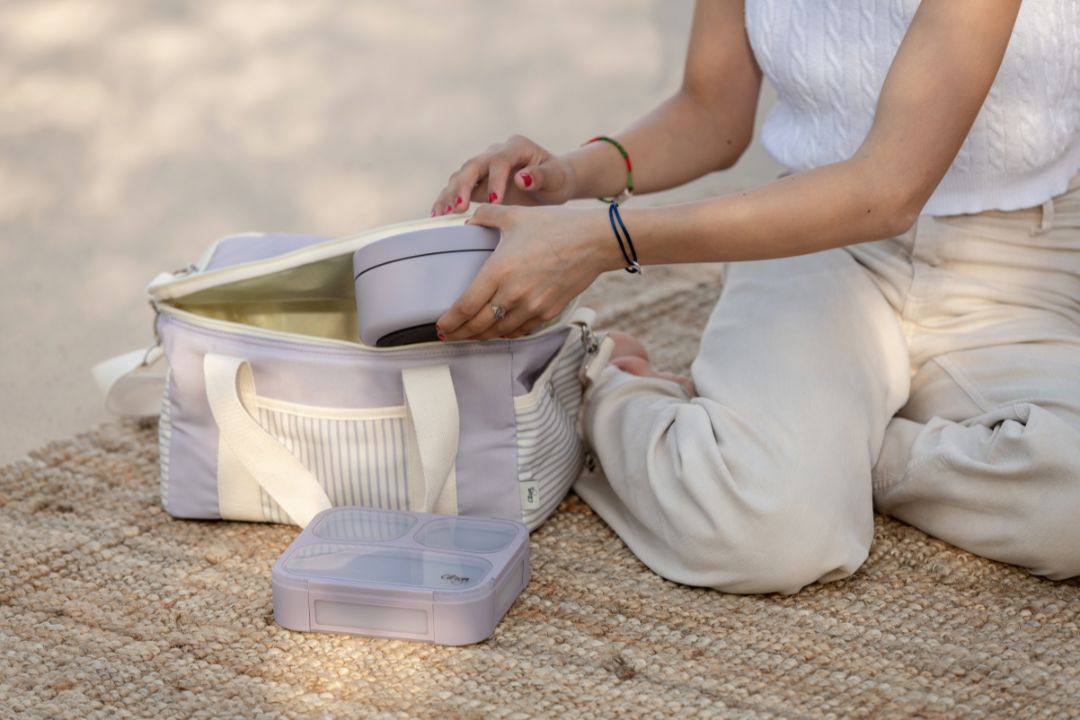
Choose a four-compartment box with an insulated food jar.

How to choose food-safe materials with verifiable eco credentials
When choosing lunchware, ask to see food contact test certificates. Look for evidence they meet overall migration limits and include targeted tests for likely migrants, such as heavy metals and plasticisers. Make sure the tests cover the temperatures and types of food you plan to carry, since heat, acidity, and oil can change how materials behave. Choose single-material or easily separable constructions to make recycling straightforward. Stainless steel, single-polymer plastics, and uncoated paperboard are much easier to recycle. Avoid fibreboard bonded to plastic films, because most kerbside schemes cannot process them. Match the material to how you will use and clean the item. Some materials retain temperature and resist odours, while others will degrade with frequent hot, wet use or dishwashing. Check surface treatments and linings too, as coatings affect both safety and end-of-life options.
Choose materials according to intended use. Stainless steel and food-grade silicone stand up to heat, repeated washing, temperature changes, and odours, so they work well for everyday lunchboxes, bottles, and containers. Compostable papers and some bioplastics, however, can lose strength with hot, wet use or machine washing, so check compostable and recycling claims against recognised standards such as EN 13432. Also confirm whether a product needs industrial composting or will actually break down at home or through local collection. Look for water-based or polyethylene-free coatings, and choose products labelled BPA-free. Avoid fluorinated greaseproof layers or unclear linings, because they can complicate food safety, recyclability, and long-term environmental behaviour.
Practical checks for food-safe, circular packaging
- Ask to see food-contact test certificates, including overall migration limits and targeted tests for likely migrants such as heavy metals and plasticisers; confirm the test scope covers the temperatures, food types, and use durations you plan, and request supplier chain-of-custody and batch traceability plus written statements on any surface treatments.
- Prefer single-material or easily separable constructions to simplify recycling: stainless steel, single-polymer plastics, and uncoated paperboard are easy to sort, whereas fibreboard bonded to plastic films usually cannot be processed by kerbside schemes.
- Match material to the cleaning regime and use-case: choose stainless steel or food-grade silicone for repeated hot, wet washing, thermal retention, and odour resistance; avoid many compostable papers and some bioplastics for high-temperature or machine-wash applications because they can lose integrity.
- Verify coatings and end-of-life claims before purchase: seek water-based or polyethylene-free linings, avoid fluorinated greaseproof layers, confirm 'BPA-free' and recycling claims with certificates, and check compostability to EN 13432 plus whether the item needs industrial or home composting and whether local collections will accept it.

Prioritise practical features that simplify your child's school day
Look for a lunch box with a dedicated insulated compartment or a built-in thermal flask. Choose vacuum-insulated or thick-walled designs, which reduce heat transfer by conduction and convection so hot soups stay hot and chilled salads stay cool. Pick boxes with removable dividers and silicone-gasket lids to keep wet or saucy dishes separate from dry or chilled snacks, and sealed compartments will help prevent cross-contamination and contain spills on the journey.
Use a slim reusable frozen pack, or a built-in cooled chamber positioned next to the chilled compartment. Frozen packs keep perishable items safer by absorbing heat as they thaw, maintaining a lower temperature without touching other foods. Choose food-safe, non-porous materials such as stainless steel or BPA-free high-density plastics, and favour components that disassemble for cleaning. Smooth, dishwasher-safe surfaces resist staining and reduce bacterial build-up. Test the closure mechanism to make sure it fastens securely and opens one-handed, check the box fits comfortably in the bag you plan to use, and opt for lightweight, compact designs with integrated cutlery or utensil storage to make packing and unpacking quicker and neater.
Keeps meals hot or cold for hours.

Keep your lunchware insulated with simple cleaning and care
Empty any crumbs, unclip and remove removable liners. Wash the interior with warm water and a mild detergent, rinse thoroughly, and leave the box open to air dry so trapped moisture cannot degrade the insulation. A few minutes of care now helps the box perform better for longer. To tackle odours and stains, work a paste of bicarbonate of soda into stubborn marks, or wipe liners with a dilute solution of white vinegar. Avoid bleach and fabric softeners, as they can strip reflective coatings and reduce thermal performance. Protect the core foam by not folding or compressing the box, keeping it away from direct heat sources such as radiators or ovens, and never tumble dry or run through a dishwasher unless the care label explicitly allows it. Compressed or delaminated insulation will lose its ability to trap heat or cold. Regularly inspect zips, seals, and seams for gaps, cracked rubber gaskets, or signs of delamination. Mend small tears with food-safe thread or sealant, and replace any removable liner that shows bubbles or separation to restore the thermal barrier.
Check an insulated box by comparing it with an uninsulated container filled with the same items. For longer days out or very warm conditions, add a removable thermal insert or a couple of ice packs to improve temperature retention. After use, leave the box open so the lining can dry and prevent odour build-up; this simple habit also helps the lining remain effective. Together, these quick checks and small additions extend the box’s useful life and make it easy to spot when a deeper repair or replacement is needed.
Choose a lunch box that combines effective insulation, the right-sized compartments, and food-safe materials to keep hot dinners hot, chilled snacks cold, and reduce spills and cross-contamination. Pair passive insulation with a chilled gel pack for cold items, or use a vacuum flask for hot foods. Warm or chill the empty container briefly before packing to slow temperature change, and pack snug, sealed pots or separate compartments for sauces and dressings to prevent leaks and contact between foods. Slowing temperature change helps preserve texture and slows bacterial growth, so food stays fresher and safer for longer.
Try using removable dividers, check packed food temperatures with a probe thermometer, and inspect seals and liners regularly to make sure containers still suit your child's portions and the length of their day. These small design choices, combined with a short cleaning and care routine, help keep food fresher, reduce single-use packaging, and stop sandwiches going soggy, making mornings calmer every back to school day.