
Fed up of lukewarm pasta and a soggy bag by the time lunch rolls around? Keeping packed lunches hot and leak-free while juggling prep, storage and the school run is a common frustration for busy families.
This post shares ten practical ways to keep hot lunches tasty and spill-free. It covers choosing heat-retaining recipes and sturdy, leakproof containers, along with simple tips on preheating, packing, reheating and care. Use these handy approaches to cut down on mess, preserve flavour and make hot meals reliable, whether you are off to work or packing a lunchbox for back to school.

1. Choose meals that keep warm and portion them sensibly
A few simple tricks will help packed meals stay warm for longer: - Choose ingredients with a high thermal mass, such as rice, pasta, potatoes, legumes, stews and roasted veg like courgette and carrot, because they hold heat and cool more slowly. - Cut food into larger chunks rather than finely chopping to reduce surface area and help retain warmth. Use a starchy or protein element as the meal’s heat reservoir. - Fill pots and flasks snugly to minimise air pockets, combine components into fewer, fuller containers where you can, and portion meals so they are eaten up rather than ending up as cold leftovers.
Choose low-water ingredients and thicker sauces, since watery foods cool faster and can slosh into drier items. Things like mashed potato, roasted veg or grain mixes hold heat better and keep their texture. Pack dressings and other liquids in screw-top or gasketed pots, and use silicone cups or built-in compartments to keep wet bits upright and separate. Nestle containers together so nothing moves, warm flasks and containers briefly before filling to cut down on heat loss, and wrap the lunchbox in a tea towel or insulated sleeve for extra retention. Place hot items towards the top of the box so they do not lose heat to colder surfaces below. Together, these simple steps reduce leaks and help food stay warm and enjoyable.
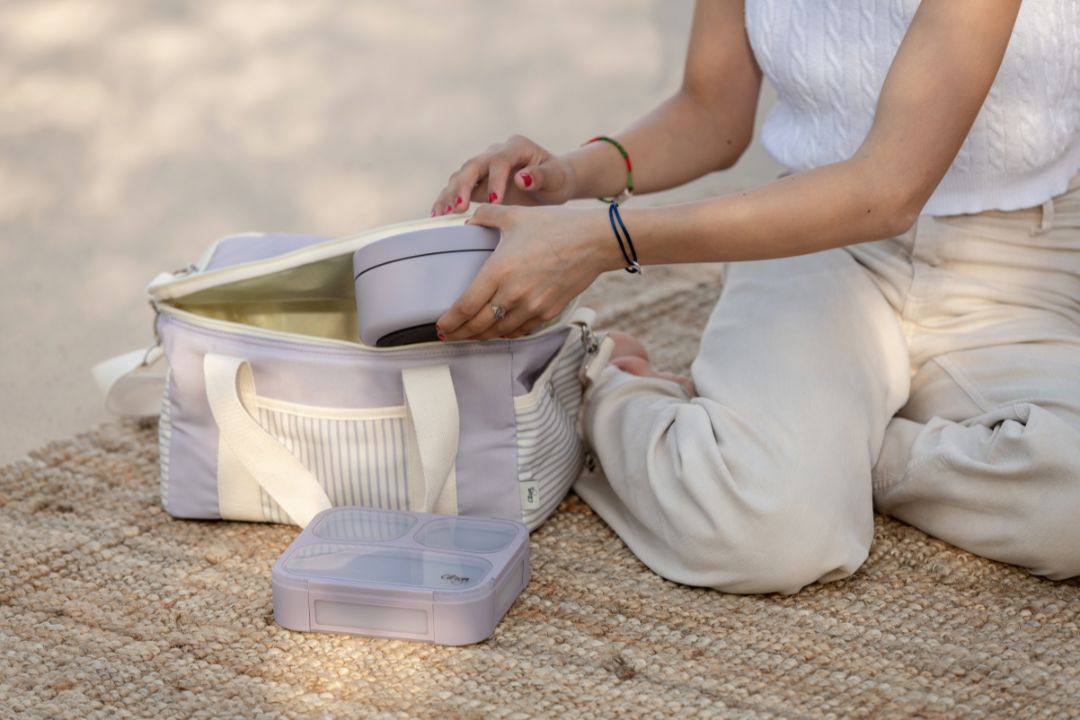
Keep lunches warm with an insulated carry bag

2. Batch-cook to organise a week's worth of family hot lunches
For busy families, batch-cook versatile bases such as stews, curries, casseroles or braised vegetables, then portion them into single-serving containers. Dense, sauce-rich dishes retain heat longer than loose pasta or leafy salads, so they are ideal for a warm lunch. Create a simple mix-and-match weekly plan by preparing a few core components and several complementary add-ins, such as roasted veg, grains and pickles, then rotate combinations to maximise variety with minimal extra cooking. Label each portion with its contents and clear reheating instructions to avoid lunchtime surprises. This approach saves time and helps keep little ones happy and well fed.
A few simple tricks will help keep hot meals cosy and spill-free on the go. Transfer hot food into insulated, leakproof containers to trap heat, and put gravies or dressings in separate sealed pots or flexible pouches. Nest containers inside a thermal carrier when travelling to reduce heat loss. Protect texture by keeping crisp items separate until serving, and thicken very thin liquids slightly to cut down on sloshing. For extra peace of mind, add a layer of cling film or a reusable food wrap under lids to stop leaks in a bag or box. Pre-warm containers or use thermal inserts if you can, and reheat portions until steaming throughout for safety and best texture. Do a trial run at home to see which dishes, portions and packing order keep warm and leak-free, then tweak the packing or insulation as needed.
Keeps batch-cooked lunches warm and leak-free on the go.

3. Choose leakproof, childproof containers that withstand busy family life
A quick tip from one busy parent to another: vacuum-insulated, double-wall containers help keep packed lunches hotter for longer by reducing heat loss from conduction and convection, so they stay noticeably warmer than single-wall options. Lids with soft silicone gaskets and positive-locking seals create a snug, flexible barrier and add gentle pressure to keep liquids secure while travelling. For sauces or other moist foods, use separate pots or containers with removable internal compartments to isolate wet components. That prevents spills and makes reheating and cleaning much simpler.
Choose stainless steel, tempered glass or food-grade silicone for durability and food safety. Stainless steel, such as common 304 (18/8) grades, resists corrosion and is less likely to hang on to odours with proper care. Glass keeps flavours pure, and silicone stands up to heat without warping. Check seals regularly by filling the container with water and turning it upside down, and replace flattened gaskets or clean lid grooves at the first sign of a leak. After washing, leave all parts to air dry so trapped moisture does not degrade seals or encourage odours. A little routine upkeep and simple leak tests will keep containers reliable when you are out and about and make them easier to use day to day.
Keeps lunches hot and sauces securely separate.

4. Keep packed lunches warm with insulating thermal accessories
Vacuum-insulated metal jars keep heat in by removing the air between the walls, which stops convection. Foam- or fibre-lined bags trap pockets of air to slow heat transfer by conduction, and neoprene sleeves add a flexible, close-fitting barrier. That makes it easy to match the right material to liquids, solid foods or mixed meals. Before you pack, rinse thermal containers with hot water, transfer food straight from the pan into a dry, pre-warmed container, and seal the lid firmly to reduce the initial temperature difference that drives rapid heat loss. These simple steps raise the container's starting temperature and help preserve both temperature and texture during the journey.
A few handy tips will help keep hot meals warm and stop sandwiches and salads going soggy. Phase-change packs give a steady release of heat, while reusable gel packs hold warmth after you heat them. Place packs next to or around the hot container, and if they are very warm wrap them in a cloth so they do not soften thin plastic. Choose screw-top jars or containers with silicone gaskets for sauces. Put dressings or gravies into separate sealed pots or insulated jars, and check seals by testing with room-temperature water before you fill them with hot contents. Keep the hot container centred in the bag and surround it with insulating layers such as a tea towel, a neoprene sleeve, or extra clothing. Keep liquids upright and secured, and minimise headspace in containers to slow convective cooling and reduce sloshing that can cause spills.
Keep meals warm—use a compact insulated jar.

5. Master lid placement to keep packed lunches leak-free
Before you close a lunchbox or flask, give the lid rim, threads and sealing surfaces a quick wipe and dry to remove smears and crumbs that stop the lid from making full contact. Check any removable gaskets or O-rings for flattening, cracks or warping and replace them if damaged, because a compromised gasket will not compress properly and can let hot liquid be forced past the seal. Line the lid up carefully, engage the twist or clip action evenly all the way around the rim, then turn the container upside down and give it a gentle shake or squeeze to check the seal. Making this a simple habit helps keep packed lunches spill-free and gives you one less thing to worry about.
When packing hot food, leave a little headspace in containers so expanding air does not push up lids or force out liquids. Allow a brief cool-down and vent steam before sealing to reduce internal pressure. For extra peace of mind, stand closed containers upright inside a sealed bag or an insulated lunch bag to catch any spills. Do a quick leak check at the sink: fill the container, close it, turn it upside down and give it a shake to spot weak seals. These simple steps bring together good hygiene, a quick mechanical check and pressure control to reduce leaks and help keep hot lunches warm and contained.
Choose an insulated jar with a secure twist lid.

6. Layer and pack lunches to keep food warm and stop spills
Try this simple trick to keep packed hot food warmer for longer: place the hottest items in the centre of the lunchbox, seal them with snug lids and nest containers where you can. Pack medium and cool items around them to reduce air gaps and slow heat loss. Wrap hot pots in a tea towel, thermal sleeve or a reflective layer before closing the carrier, since a thin insulating layer cuts heat loss without adding bulk. Seal lids from the inside out so inner jars stay shielded by outer containers, and stabilise stacked pots so seals are not pressed. Keep the carrier closed until ready to eat to trap the warm air inside.
A handy trick is to keep liquids upright and double-sealed by using screw-top jars or sealed pouches inside a second zip bag. Place these in a dedicated compartment lined with an absorbent cloth or pad to catch any drips. Sit a compact, heat-retaining item such as a small portion of rice, mashed potato or a tightly packed casserole next to delicate dishes; denser foods hold heat and help smooth out temperature swings. Use silicone cups, scrunched parchment or a folded cloth to fill gaps, and press firmer items gently against lids to stop things moving about. That cuts down on sloshing, eases the strain on seals and reduces the chance of leaks.
Seal and nest a compact jar to lock in heat.

7. Warm containers before you leave to keep lunches at the right temperature
Handy tip: warm the inside of your flask or lunch box first by rinsing it with very hot water until the surface feels warm, then empty it and add the hot food. Warming the container reduces the initial temperature difference and helps keep food hotter for longer. Let freshly cooked food rest briefly on a plate before sealing so steam can escape, as trapped steam can build pressure and condensation, which might force liquids through lids and make textures soggy.
Quick tip for packed lunches: fill empty space and cut down on air movement by tucking in a snug food item, a folded tea towel, or an insulating sleeve. Air pockets encourage convective cooling and make contents slosh. Make sure seals are dry and lids sit evenly, then carry containers upright and secured so they do not get squashed or pumped, which can cause leaks. Check your routine with a probe thermometer or a short mock journey to see how well temperatures are retained and to spot any leaks. That will reveal weak points, for example a metal lid that needs extra padding, a loose seal, or a container that benefits from a little preheating.
Preheat, pack snugly in a leak-proof thermal jar.

8. Pack and transport essentials smartly for short and long journeys
A quick trick to keep food hotter for longer is to warm the flask or jar first. Rinse it with very hot water, pour that out, then add piping-hot food and pack the container as full as possible. Less air inside means less heat loss and a warm vessel reduces the initial temperature drop. Match the insulation to the journey. For short trips, a soft insulated lunch bag or a thermal sleeve with a sealed container will usually be fine. For longer outings, a vacuum-insulated jar or an insulated box teamed with heat packs will hold the heat better. Also think about portion size: choose a container that fits what you are serving so you avoid large empty spaces. That cuts down on convection inside the container and keeps food at a nicer serving temperature without adding bulk.
Pack sauces and dressings in small, dedicated leakproof pots. Test the lids by filling them with water and turning them upside down, and for extra security wrap a strip of kitchen roll or a silicone band around tricky lids. Keep hot items upright and wedge them between other containers or soft padding, or use a rigid compartment to stop tipping and sloshing; this prevents mess and helps food stay warm for longer. Store crisp items separately to preserve crunch, and pop a piece of kitchen roll or a thin cloth under lids to catch any condensation. If you can reheat at your destination, transfer food out of sealed containers before warming.
Keeps small meals hot and spill-free.

9. Reheat meals safely at school, work and outdoors
A handy tip for keeping packed food hot: pick the right container and warm it first. Microwave-safe boxes, hob-safe containers and insulated food flasks all do the job. Rinse an empty flask with hot water before filling to heat the walls and help food stay piping hot for longer. When you are in communal settings like back to school or at work, use a vented lid or leave the cover slightly loose when using a shared microwave to avoid splatter. If you are outdoors, rely on an insulated flask or a portable food warmer and preheat containers to keep food safe without mains power. For liquids, choose wide-necked jars to reduce sloshing, and pop bottles or jars inside an extra leakproof bag for the journey.
A few simple tricks will help leftovers heat evenly and stay safe to eat. Cut dense items into similar-sized pieces, add a splash of water or stock to risottos or stews, and stir or rotate food partway through heating. Check the centre is piping hot with a food thermometer or by looking for steam. Leave a small gap or prop the lid open slightly to let steam escape, and place containers in a leakproof bag to control moisture and prevent spills. Follow food-safety basics: cool and chill leftovers promptly, reheat only once, be cautious with high-risk foods such as cooked rice and shellfish, and discard anything that smells off or shows a change in texture.
Preheat an insulated jar to keep meals piping hot.
10. Keep containers clean and stored properly to avoid leaks
A quick routine check of lids and seals keeps containers leak-free and fresh. Remove any rubber or silicone gaskets and give them a gentle press to test their bounce. Look closely for hairline cracks or areas that look permanently flattened. When the gasket is back in place, do a simple water test by filling the container, inverting it over a towel and watching for any drips. For cleaning, take lids apart and pop removable pieces into warm, soapy water. A small brush is handy for getting food out of narrow grooves. Rinse everything well and leave to air dry completely to avoid mould and unpleasant odours. Match your cleaning method to the material: use non-abrasive sponges on stainless steel, steer clear of harsh detergents on rubber and plastics, and avoid high-heat dishwasher cycles for items that show early warping or a weakening seal. If a gasket has lost its bounce, replace it sooner rather than later. For small chips, food-safe silicone can be a temporary fix. Store lids loosely or separately so seals are not squashed during storage.
A few simple steps will help keep lunchboxes smelling fresh and reduce the risk of leaks. Remove persistent smells with a paste of bicarbonate of soda and water, or give them a quick vinegar rinse. Tackle stains gently using salt and lemon, rubbing carefully to avoid damage. After any repair or a thorough clean, fill the container with water and check for leaks. Keep a simple log of each container’s age, any seal or gasket changes and repairs so you can retire items before wear causes problems. These little habits help preserve seals and make transporting hot lunches much less stressful.
A few simple habits can make hot lunches reliably warm and leakproof. Preheating a flask or insulated pot with hot water, packing food so it sits snugly with fewer air gaps, and keeping sauces in their own sealed pot all help slow heat loss and stop spills on the school run. These small tweaks make warm, spill-free meals much more dependable.
Try these ten practical tips, from choosing heat-retaining ingredients to simple gasket checks, to cut down on mess and preserve flavour on every outing. Experiment with different combinations, tweak the packing order and keep easy maintenance habits so hot lunches arrive warm, satisfying and stress-free.