

Ever opened a packed lunch to find a soggy sandwich, a yoghurt puddle, or a salad gone limp and unappetising? Whether you are packing for school, the office, or a family picnic, keeping food fresh and safe until mealtimes can feel like a daily challenge.
This guide looks at ten factors that affect how long an insulated lunch box keeps food fresh. It covers food spoilage risk, safe target temperatures and holding times, insulation, seals and closures, materials, interior layout, ice packs, cleaning, portability, and durability. Keep reading for practical tips to help you pack, choose, and care for a lunch box so food stays safe and tasty until mealtime.
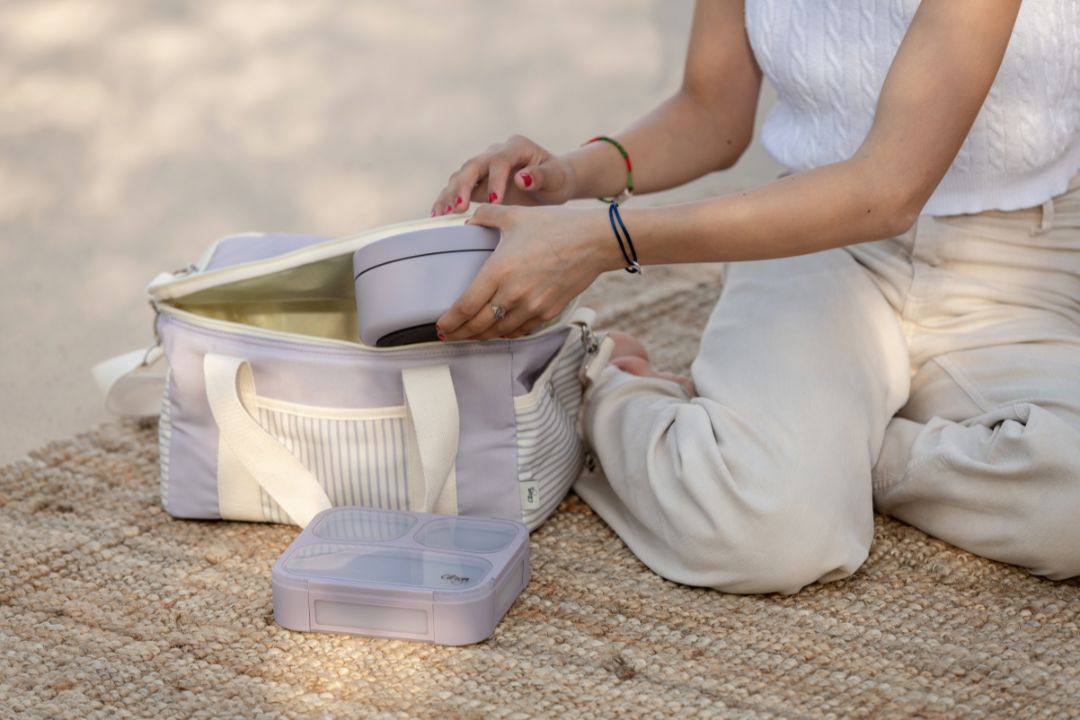
1. Choose foods by spoilage risk to keep packed lunches fresh
Sort foods into high-, medium-, and low-risk groups by looking at three things: protein, water activity, and pH. Water activity describes how much free moisture a food contains, and pH measures how acidic or alkaline it is. Foods with lots of available moisture and a neutral pH let microbes multiply more quickly. High-risk items include cooked meats, fish, poultry, soft dairy, egg or mayonnaise-based salads, and sushi, because they offer both nutrients and moisture that bacteria feed on. Medium-risk examples are soft fruit, soft cheeses, and prepared sandwiches. Low-risk foods such as whole apples, raw carrots, nuts, hard cheese, and cured or dried meats contain less available moisture or are more hostile to microbes, so they resist spoilage better.
Pre-chill containers, keep all cold items together, and use frozen elements as both food and a cooling source. Place higher-risk foods, such as sandwiches with mayo or dairy-based items, in direct contact with the frozen element inside a leakproof tub to improve cooling and reduce warm spots. If refrigeration may be intermittent, choose preparations that are naturally safer: acidic, salty, sugared, or dried foods. Examples include pickled vegetables, vinaigrette-dressed salads, dried fruit, cured meats, and hard cheeses. Lower pH or reduced water activity makes it harder for microbes to grow. Prevent cross-contamination and moisture-driven spoilage by packing raw produce and ready-to-eat proteins in separate sealed tubs, avoiding loose sauces that can wet other foods, and placing moisture-prone items above absorptive snacks. Before eating, give foods a quick visual and smell check. Label containers when you rotate perishable fillings, and favour combinations that are inherently stable so problems are easy to spot without complex testing.
Keep perishable lunches cold and mess-free.

2. Set the target temperature and choose how long food remains hot or cold
Begin by setting clear target core temperatures: aim for cold foods at 5°C or below, and hot foods at 60°C or above. Check the centre of each item with an instant-read thermometer before you seal the lunch box so you know you are packing at the correct temperature. Match your packing strategy to thermal mass and starting temperature. Pack items that retain heat or cold well, for example dense proteins like cooked chicken or hard-boiled eggs, cooked grains, or a frozen water bottle to keep things chilled. The larger the thermal mass and the smaller the temperature gap between the food and its surroundings, the slower the temperature will drift. Choose the right combination and placement of insulation and thermal sources. Pair thick or vacuum insulation with cold packs or hot packs set to the intended range, and position those packs adjacent to perishable items. Keep hot and cold zones separate using an insulated divider or a small reusable pouch to prevent unwanted warming or cooling. Minimise temperature loss by reducing how often you open the box, filling empty spaces with extra layers or a rolled-up napkin, and wrapping very heat-sensitive items in an extra insulating layer. Finally, avoid leaving the lunch box in direct sunlight or near other heat sources while it is being stored or transported.
Try this over a few days: use a calibrated thermometer or temperature indicator strips, and note which packing methods, starting temperatures, and cold packs consistently meet your targets. Use those notes to tweak packing, adjust target temperatures, or change the number and placement of cold packs instead of relying on guesswork. An evidence-based routine like this helps you predict which combinations will keep specific foods fresh for the holding time you need in everyday life.
Use an insulated bag with a pocket for ice packs.

3. Choose insulation that helps lunches retain hot or cold temperatures for longer
Heat reaches packed lunches in three ways: conduction, convection, and radiation, and each needs a different defence. Conduction is heat travelling through solids; low thermal conductivity materials slow that transfer, and vacuum-insulated walls or rigid vacuum panels provide the strongest barrier for a given thickness. Convection moves heat via moving air or liquid; you cut it by preventing airflow — for example, closed-cell foams trap still air, while vacuum layers remove air entirely. Radiation is heat carried as electromagnetic waves, and shiny, reflective foil layers bounce that energy back to reduce radiative gain. Manufacturers often combine vacuum, foam, and reflective layers so a thin wall can resist all three modes, rather than relying on a single material.
When choosing insulated lunchware, match the insulation to what you actually pack. For small volumes where you need the best temperature retention, choose vacuum-style construction. For soft cool bags or bulkier packing, pick thicker foam. If you expect strong sunlight, add a reflective or insulated lid to limit heat gain. Bear in mind that more insulation usually increases size and weight, so balance temperature retention with portability and how you like to pack. To test a lunchbox at home, put a thermometer and an ice pack or a frozen bottle beside the food you would normally take, seal the box, and check the temperature (or how much ice remains) after a set time. Comparing starting and later temperatures gives a clear, repeatable measure of performance you can use to compare models and verify their marketing claims. Look after the insulation: keep lids and zips properly sealed, avoid compressing foam or denting vacuum panels, and repair or replace any damaged insulation. Gaps, wet insulation, or degraded seals create convective shortcuts that can undo the rated performance of even the best materials.
Use an insulated lunch bag for better temperature retention.

4. Check seams and closures for a secure, leak-proof seal
Seams and closures are the main routes for air and moisture to move in and out of a lunch box. Even tiny gaps let air flow, which speeds heat loss and encourages condensation on food, so perishable items go soggy or stale more quickly. Continuous seals, for example a zip with a rubberised gasket or a roll-top closure, compress more evenly and leak less than point-contact snaps or stitched flaps, so they do a better job of holding in temperature and keeping moisture out. Match the closure to what you usually pack: if you carry warm meals, soups, or yoghurt, choose a continuous seal combined with good insulation to help keep food at the right temperature and prevent sogginess.
A few simple checks will keep seals working and help food stay fresher for longer. How to inspect seals - Look for frayed stitching, visible gaps, or hardening or detachment of gaskets or seam tape. - Press the bag to expel air, then watch whether it reinflates; that can reveal leaks. - Run a fingertip along the seal to feel for inconsistencies or rough spots. How to maintain seals - Clean and dry seals after use so grime and moisture do not accelerate wear. - If a zip feels stiff, ease it with a food-safe lubricant. - Restitch worn areas or add seam tape where stitching has loosened. - Replace degraded gaskets, or fit a simple inner pouch if a full replacement is not an option. How to pack to protect closures - Avoid overfilling and do not force rigid containers against the seal. - Point the closure upwards to reduce the chance of spills getting into seams. - Use a secondary sealed pouch for liquids. Small, regular repairs and careful handling make a noticeable difference to performance and longevity.
Keep meals warm and sealed for hours.

5. Choose food-safe, odour-resistant materials
For lunchboxes and food containers, choose food-grade, non-porous stainless steel for main compartments, and food-grade silicone for seals and inserts. Their smooth surfaces have fewer tiny pores where odour molecules and stains can cling, so smells rinse away more easily and bacterial build-up is less likely. Many plastics absorb flavours and volatile compounds, so pick ones clearly marked for food contact and labelled BPA-free, and use removable, dishwasher-safe liners to reduce long-term odour retention. Together, these choices limit lingering smells and make routine cleaning more effective.
When packing acidic foods, such as tomato-based sauces or citrus fruits, avoid plain aluminium, because metal contact can change taste and appearance. Use a lined or treated metal interior, or put acidic items in a separate sealed container inside the lunchbox. Be cautious with surface treatments and additives. Non-stick and antimicrobial coatings may wear over time and lose effectiveness. Favour materials that are naturally odour-resistant, and check that any coating carries a clear food-contact safety mark or certification. Try a simple smell test: place a strongly scented food in an empty box for 24 hours, then smell it to judge odour retention. Choose removable seals, machine-washable fabrics, and replaceable liners so you can launder or swap parts when smells settle in. Replace foam or fabric liners that trap smells rather than relying on occasional cleaning hacks, because they can harbour odours and reduce freshness and hygiene.
Pack stainless-steel utensils in a BPA-free silicone case.

6. Optimise capacity, layout, and portion sizes for packed lunches
Optimise the lunch box volume to match your usual meal: fill most of the internal space without forcing the lid closed. Less air in the box slows temperature change, while overfilling can damage seals or squash food. Group items by temperature sensitivity, and place cold items against ice packs or frozen fruit pouches so they stay cooler for longer. Keep wet foods in small sealed tubs or wrapped with an absorbent layer, such as a paper napkin, to limit moisture transfer. Put the most perishable items closest to the cold source to preserve a lower local temperature.
Use separate, well-sealed containers or compartments for higher-risk foods, such as dairy, cooked meats, and salads. That limits cross-contamination and makes it easy to swap out only the perishable parts. Portion food into compact units that sit flush in the box; snug, dense servings hold their temperature better than loose, bulky items, without squashing delicate textures. Pre-chill rigid containers and solid foods where possible, and drain excess liquid from salads or stews, because liquids store and transfer heat efficiently. Avoid packing large, open liquids upright, and arrange items so cold elements surround the most vulnerable foods.
Keeps meals hot or cold for hours

7. Use ice packs for cool, fresh lunchboxes
Several small changes will help keep lunches cold for longer. Choose frozen water bottles or solid gel packs, as they retain cold longer. Prefer flat or contoured packs that sit flush against food containers, because greater surface contact lets them absorb heat more efficiently as they thaw. Pre-chill the empty lunch box and the ice packs to reduce the initial heat inside; starting colder delays warming and extends the packs' useful life. Position packs around the most perishable items, and place one on top to limit warm-air movement. Wrap packs in a thin cloth to prevent condensation from wetting food or packaging.
A handy trick for packed lunches is to freeze parts of the meal so they double as coolants: small yoghurt pots, chunks of fruit, or portions of cooked rice or pasta all add thermal mass as they thaw and become edible. Keep commercial ice packs sealed and separate from ready-to-eat food, and tuck them into their own compartment or a small sealed container to avoid direct contact. Add an absorbent layer—a folded paper towel, a reusable cloth, or a small pot—to catch any condensation, and place it where pooling is most likely, such as the bottom of the lunchbox or along seams. Moisture that sits against packaging speeds bacterial growth and shortens freshness, so these simple steps help maintain cooling performance and reduce the risk of leaks without extra equipment.
Keep lunches colder longer with an insulated lunch bag.

8. Choose items that are easy to clean, hygienic, and low maintenance
Pick a lunch box that comes apart so liners, trays, and lids can be removed and washed separately. Only put parts in the machine if the manufacturer says they are dishwasher safe; otherwise hand-wash them with a mild detergent and a soft brush to dislodge trapped food particles. Take care with the insulated core: avoid strong detergents and abrasive scrubbing pads, which can damage the insulation. After cleaning, check removable parts and hidden seams for any residue. Trapped crumbs and film lead to lingering odours and reduce how well a box keeps food fresh, so spotting trouble spots early makes regular cleaning easier and helps the box perform for longer.
Pay extra attention to seams, zip tracks, foam edges, and corners, where crumbs and moisture hide. Use a small brush or a cotton bud to reach crevices, then wipe the interior and leave the box open to dry thoroughly. Choose non-porous interiors such as stainless steel, food-grade plastic, or silicone. These surfaces resist staining and odour because they do not absorb oils, whereas porous fabrics and untreated foam trap oils and smells. Clean routinely with a mild detergent. For stains, make a paste of bicarbonate of soda and water, gently rub the area, then rinse well. To neutralise odours, wipe with diluted white vinegar and rinse again to remove any cleaning residue. Adopt a simple maintenance routine: wipe after each use, deep-clean spills as they occur, and regularly inspect seals, zips, and linings so you can repair or retire parts that retain moisture or no longer close properly.
Removable liners make cleaning effortless—choose one with insulation.

9. Ensure portability, comfortable handles, and schoolbag fit
Start by matching the lunch box's external dimensions to the school bag so it sits neatly in a side or main pocket. Prefer slim, rectangular shapes that slide in easily, rather than tall cylinders that shift and make zip fastenings harder to close. Lift a filled box to check the handle: a centrally located, reinforced attachment and a padded grip will reduce tipping and spread pressure across the hand. Look for removable shoulder straps or loop points for a carabiner so you can secure the box inside a rucksack. Securing the lunch box cuts down on internal sloshing and lowers the chance of spills that compromise freshness, and a stable base helps keep containers upright and cold packs in direct contact with food.
Prioritise a flat, rigid base and simple partitions or slip pockets to avoid compressing the insulation. Preserving those trapped air pockets slows heat transfer, so hot food stays warm and chilled food stays cool for longer. Choose smooth zips or clasps that open one-handed, and wipe-clean linings, as these speed up everyday use and mean the lid is open for less time, which reduces heat loss. Check the handle size for smaller hands and include an external pocket for cutlery and napkins; easier, quicker access reduces the chance food is exposed to warm air.
Slides into backpacks neatly and keeps food cooler.

10. Choose durable, repairable, and sustainable designs
When you’re checking lunchware or on-the-go kit, look for parts that can be replaced rather than having to discard the whole item. Removable liners, zip sliders, and gasket seals can often be swapped out, and a single replaced part may restore performance for months or years. Accessible screws or sewn seams are a good sign that repairs are feasible; glued joints and complex laminates usually prevent separation at the end of life and make recycling harder. Where you can, choose single-material constructions or designs with clearly separable components. Detachable fabric covers, metal shells, and removable foam cores make sorting and recycling much easier. Finally, check for clear material disclosures and any stated recycled content — those labels help you assess actual recyclability.
Fix small tears and reinforce worn stress points as soon as you notice them: re-stitch seams and replace broken fasteners to stop moisture and dirt from accelerating foam and seal breakdown, which reduces insulating performance. When choosing a lunch box, weigh the trade-offs between weight, durability, and insulation type. Vacuum-insulated containers hold temperature best but can dent and lose their vacuum if dropped, whereas thicker foam cores tolerate knocks more easily, so match the construction to how you pack and handle the box. Extend a box's useful life by choosing designs with spare parts or repair guides, buying second-hand, and planning to donate or upcycle it when you no longer need it.
A few simple steps make a big difference when you pack food for the day. Keep temperature under control, limit moisture and contamination, and choose suitable materials and an efficient layout. Use effective insulation and a snug seal, add a chilled element such as a frozen ice pack or a chilled bottle, portion food sensibly, and wash containers after every use. Together, these habits slow spoilage, reduce sogginess, and make packed food more reliable.
Use the ten headings as a practical checklist: choose low-risk fillings such as cooked pasta, yoghurt, and peeled fruit; pre-chill containers in the fridge so they start cold; place cold packs in direct contact with chilled items for maximum cooling; and repair or replace worn seals to keep insulation working. A short, consistent routine of packing, testing temperatures, and maintaining seals reduces bacterial growth, keeps lunches safer and more appetising, and makes it easier to trust the meal you send out the door.