

You’ve probably opened your child’s lunch to find a soggy sandwich, a warm yoghurt, or a limp, neglected salad. Choosing the right insulated lunchbox preserves temperature and texture, helping food stay fresh and safe, but not all designs perform equally.
In this guide we'll explore how temperature control, insulation materials, the right size, and practical compartments affect food freshness, and which everyday features make packing and cleaning quicker. The tips focus on safety, sustainability, and usability, with clear, evidence-based guidance so you can pack lunches that still look and taste good by lunchtime.

Keep packed lunches safe with simple temperature-control tips
To keep packed lunches safe, avoid the bacterial danger zone, where most bacteria grow between 5°C and 60°C. Keep cold items at 5°C or below, and hot items at 60°C or above. Use a food thermometer to check the internal temperature of the lunch box or individual containers before you give food to a child. Measuring temperatures gives a clearer indication of safety than guessing by touch.
Match the lunchbox construction to how you actually pack. Vacuum-insulated walls and tight-sealing lids reduce heat transfer, so they suit hot meals and chilled items. Foam-core insulation gives lightweight thermal protection, while quilted or soft insulated shells cut weight but trap more air, so they need more frozen thermal mass to keep food cold. Use frozen ice packs or frozen bottles as cold reservoirs, pack containers snugly to reduce empty space, and press cold sources directly against perishable items rather than leaving them loose. Keep raw components separate from ready-to-eat foods in leakproof containers. Absorb excess condensation with a small cloth or paper liner, and avoid packing damp items next to dry snacks to protect texture and food safety. Check performance by measuring temperatures in different compartments, inspect seals and zips for any gaps, and wash removable liners to remove food residue. Make sure the interior is fully dry before storing to prevent mould and odours.


How different insulation types and materials keep lunchboxes fresh
Insulation works in three main ways: removing air to stop conduction and convection, trapping tiny air pockets in closed-cell foam to slow heat flow, and using reflective or metallised liners to cut radiant transfer. Makers combine these approaches in single-wall panels with a foam core, double-wall layers, or vacuum-jacketed constructions so each layer tackles a different type of heat loss. For a short walk, a thin foam panel often does the job, while a vacuum jacket keeps temperatures steady on longer outings. Seals and closures matter too — zips, roll-top closures, internal flaps, and taped seams all limit air exchange and reduce convective loss. As quick checks, look for a sturdy zip, internal baffles, and a continuous seal; these simple features often predict better real-world performance.
Look for smooth, non-porous liners such as PEVA or metallised film; they wipe clean and resist stains and odour much better than fabric-backed insulation. Removable liners let you wash or replace the interior without degrading the insulation, which makes them especially practical for busy school mornings and spill-prone toddlers. There are trade-offs to consider: vacuum-insulated metal panels usually retain temperature best, but they add weight and make the bag more rigid. Foam and fabric systems are lighter, more packable, and often more comfortable to carry. Match the material and construction to your child’s routine, the way they carry and store their lunchbox, and your recycling priorities. If recyclability matters, favour mono-material designs that are easier to process.


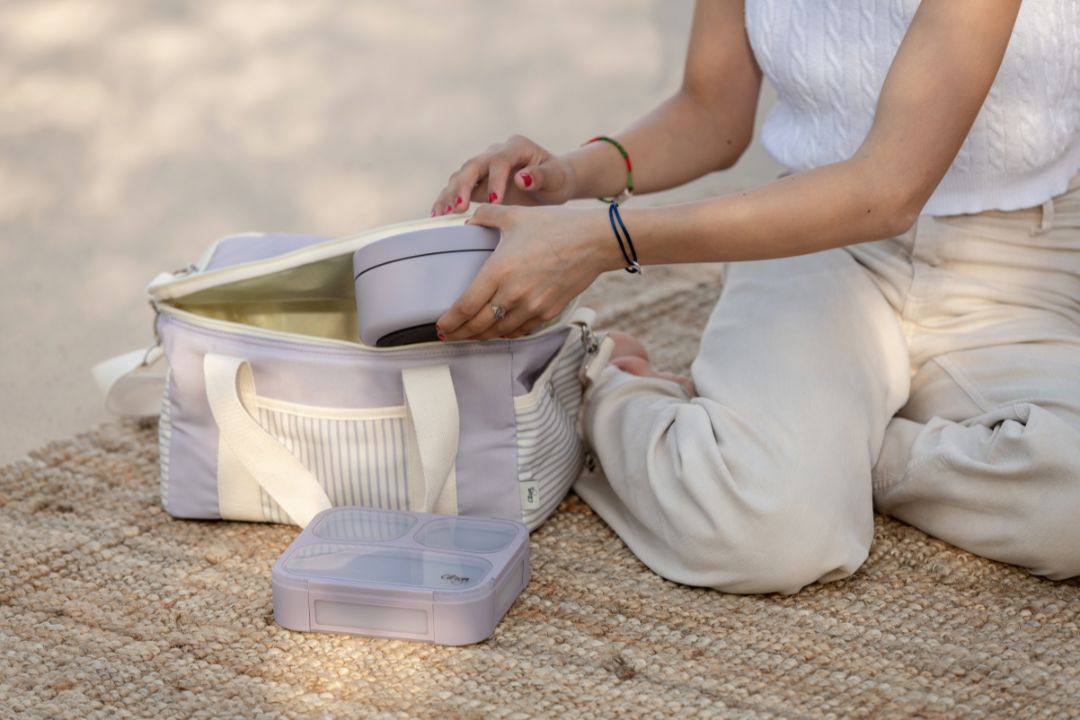
Choose the right lunchbox size and compartments for your child's portions
Try this at home: fill the lunchbox with a typical plateful or use snack pots and note the volume. Leave room for an ice pack or a small insulated bottle so chilled items sit upright without squashing the food. Arrange compartments to mirror a meal: a main, a portion of fruit or veg, snacks, and a chilled item. Keep wet or saucy foods in a sealed section to protect anything crisp and to reduce temperature transfer between compartments. Choose adjustable dividers or removable inserts that resize as appetites change and lift out easily for proper cleaning, rather than fixed moulded pockets that trap crumbs and moisture.
Choose compartment sizes with your child’s age and activity level in mind. For toddlers, use bite-sized portions and smaller sections; for older children, allow room for a main, plus a carbohydrate and a protein. Use small pots or portion markers to standardise servings and reduce waste. Test the lunchbox in your child’s school bag and on a fridge shelf to check fit and handling, and try the lids yourself to make sure they seal tightly but are still easy for little hands to open. Check that compartments accept ice packs or an internal thermos so chilled items sit snugly and keep their temperature.
Match compartments to portions, control temperature, and simplify upkeep
- Tailor compartment layout to the child: for toddlers include several small, bite-sized sections; for primary-school children include a main, a fruit or veg, a snack, and a chilled item; and for older or sporty children provide a larger protein portion, a separate carbohydrate, and space for a small insulated bottle. Fit removable inserts or adjustable dividers so you can resize sections as appetites change, and add compact, labelled containers or visual guides to keep portion sizes consistent and cut waste.
- Keep chilled and crisp foods separate: reserve a snug space for an ice pack or internal thermos so temperature-control items sit without squashing food, place wet or saucy items in leakproof pots with silicone gaskets, and position chilled sections away from crisp snacks to prevent sogginess. Confirm seals by inverting pots before use to check for leaks.
- Adopt simple packing, testing, and cleaning rituals: measure typical portions at home by filling the box with a usual plateful and leave room for cooling accessories, trial the packed box in the child’s bag and on a fridge shelf to check fit and handling, and choose lift-out trays or inserts for thorough washing and drying. Run a quick child-opening test to ensure lids seal tightly yet remain manageable for the child.

Choose practical features that make everyday life easier
Choose a lunch box with child-friendly closures, such as large zip pulls or magnetic snaps, so little hands can open and close it easily. To check seals at home, close the bag and press along the seams; if you feel air escaping, the closure is not continuous and can let cold in or heat out. Opt for compartment layouts with removable bento-style inserts or upright, leakproof pots so cold packs and hot items stay apart, and invert each pot to confirm the seal before you pack. Favour water-resistant exteriors and removable inner liners or trays that are machine-washable or dishwasher-safe, which helps prevent odours and bacterial build-up and keeps performance steady over time.
Assess portability by lifting the empty bag to check weight and whether it stays upright when carried. Check the handle and strap are the right size for little hands, because a heavy or floppy bag increases spillage and temperature changes. Look for a dedicated pocket for a chilled pack or an insulated flask, and run a simple home test: fill containers with warm or cold water, pack the bag as you would, then measure or check the temperature at the end of the period between packing and eating to verify performance. Pack an absorbent pad or use a vented pocket to reduce condensation, and make sure removable components sit upright so cold packs do not touch hot items and thermal transfer is limited. These practical checks provide direct evidence of how well a lunch box will keep food safe and appetising in everyday use.

How to choose safe, sustainable, and easy-to-clean materials
For steady temperature control, opt for double-walled, vacuum-insulated stainless-steel containers. Stainless steel resists odours and staining, cuts down conductive heat transfer, and is widely recyclable and long-lasting. Check liners, seals, and any coatings for food-contact-grade certification and clear safety labelling, which helps protect against bisphenol A (BPA), phthalates, and heavy-metal contamination rather than relying on marketing claims. Choose smooth, continuous inner shells or removable insulated liners with wipeable nylon or polyester surfaces so seams clean thoroughly and moisture does not become trapped.
When choosing lunchware or bottles, pick removable, dishwasher-safe silicone gaskets and lids. They release trapped crumbs, withstand repeated washes, and can be taken out to dry and inspect, which helps reduce the risk of mould compared with fixed seals. Steer clear of glued or foamed inner linings that trap moisture and break down, as they make cleaning harder and shorten the product’s usable life. Where you can, opt for single-material interiors and recyclable metals, or designs with replaceable seals or insulation panels, because these make recycling or repair simpler. These material and design choices lower a product’s embodied waste over its lifetime while keeping reliable insulating performance.
After assessing material choices and cleaning needs, think about what you usually pack, whether chilled yoghurt and salads or warm pasta and soup, and choose a lunch box to match. Vacuum-insulated walls and tight-sealing lids slow heat transfer, while frozen ice packs and snug containers add reliable thermal mass. Use a food thermometer to check internal temperatures, inspect seals and zips for gaps, and do a trial run by packing the bag as you would on a school day to confirm perishable items stay out of the temperature range where bacteria multiply quickly.
Use the guide's headings: temperature control, insulation types, size and compartments, practical features, and materials to prioritise choices that match your child's routine and cleaning needs. Run a simple home test: pour in very hot or iced water, seal the container, and check after an hour to see how well it holds temperature — a quick check like this shows what to expect on a busy school morning. Inspect liners and gaskets regularly, and remove, wash, and fully dry any detachable parts so lunches stay appetising, safe, and ready to eat by lunchtime.